Sometimes the keyboard tray jumps out of the slides. This can happen if the keyboard tray is used as a handle or if it is pushed into a wall. To put the keyboard tray back into the cart properly, follow the steps below.
1. Open the worksurface and locate the two travel limiter screws (present on newer models). If travel limiter screws are not present, proceed to Step 2. If the screws are present, loosen and remove the screws(do not discard).
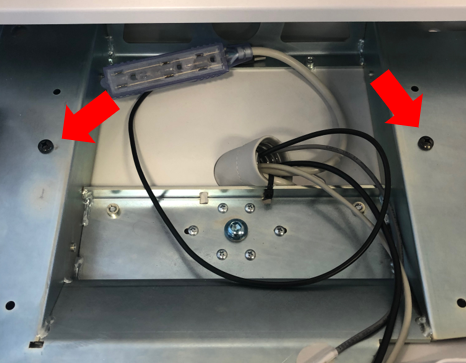
Figure 1. Travel limiter screws
2. While supporting the keyboard tray, fully extend the keyboard tray outward. On the inside of the arms that support the keyboard tray are two drawer slides. Locate the release levers for each drawer slide. Using your thumbs, move the lever down on the left side and up on the right side to release the slides. While engaging both release levers, pull the keyboard tray completely out of the upper unit. It may be necessary to lengthen the keyboard and/or mouse wires to accomplish this step.
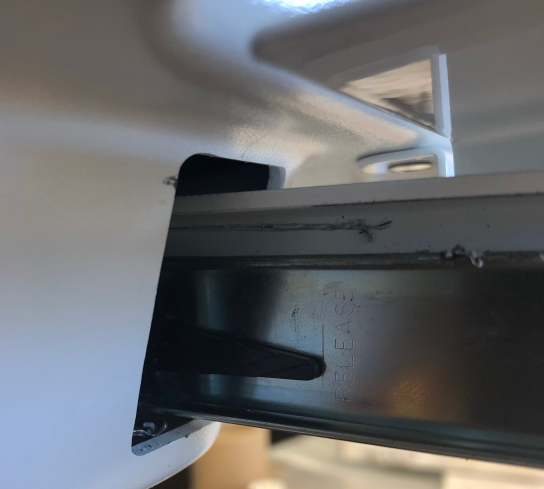
Figure 2. Drawer slide lever
3. Once the keyboard tray is free from the cart, realign the portion of the slides connected to the keyboard tray with the other halves of the slides inside of the upper unit.
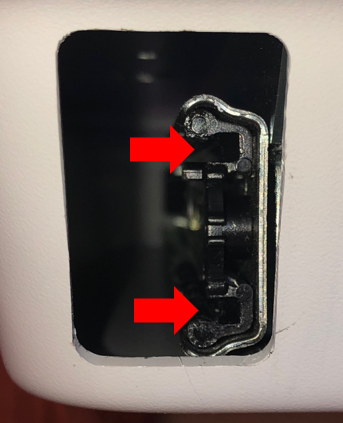
Figure 3. Locations to align keyboard slides
4. Grasp the keyboard tray and reinsert it into the cart. Apply an inward pressure to keep the slide halves engaged with their respective other halves. Continue applying the inward pressure until the keyboard tray has been properly seated. You will hear two small “clicks” when the keyboard tray has been inserted properly.
5. Move the keyboard tray in and out to verify that it travels smoothly. If not, repeat this process until it is installed properly.
6. Once the keyboard tray has been properly reinstalled, reinstall the two travel limiter screws, if applicable.
Comments
0 comments
Please sign in to leave a comment.