Follow the attachment below to properly install a CPC-8.
Tools required:
#2 Phillips Drive Screw driver or #2 Square bit drive
Parts Included:
(1) Power Cord
(1) Cord Hook Bracket
(2) #10 x 3/4” Long Pan Head Phillips Drive Recex Low Root Screws
(1) 1/4-20 x 5/8” Long Pan Head Phillips Drive Machine Screws
(1) Cord Clamp
INSTALLATION WITH WORK SURFACE AND CORD TRAY:
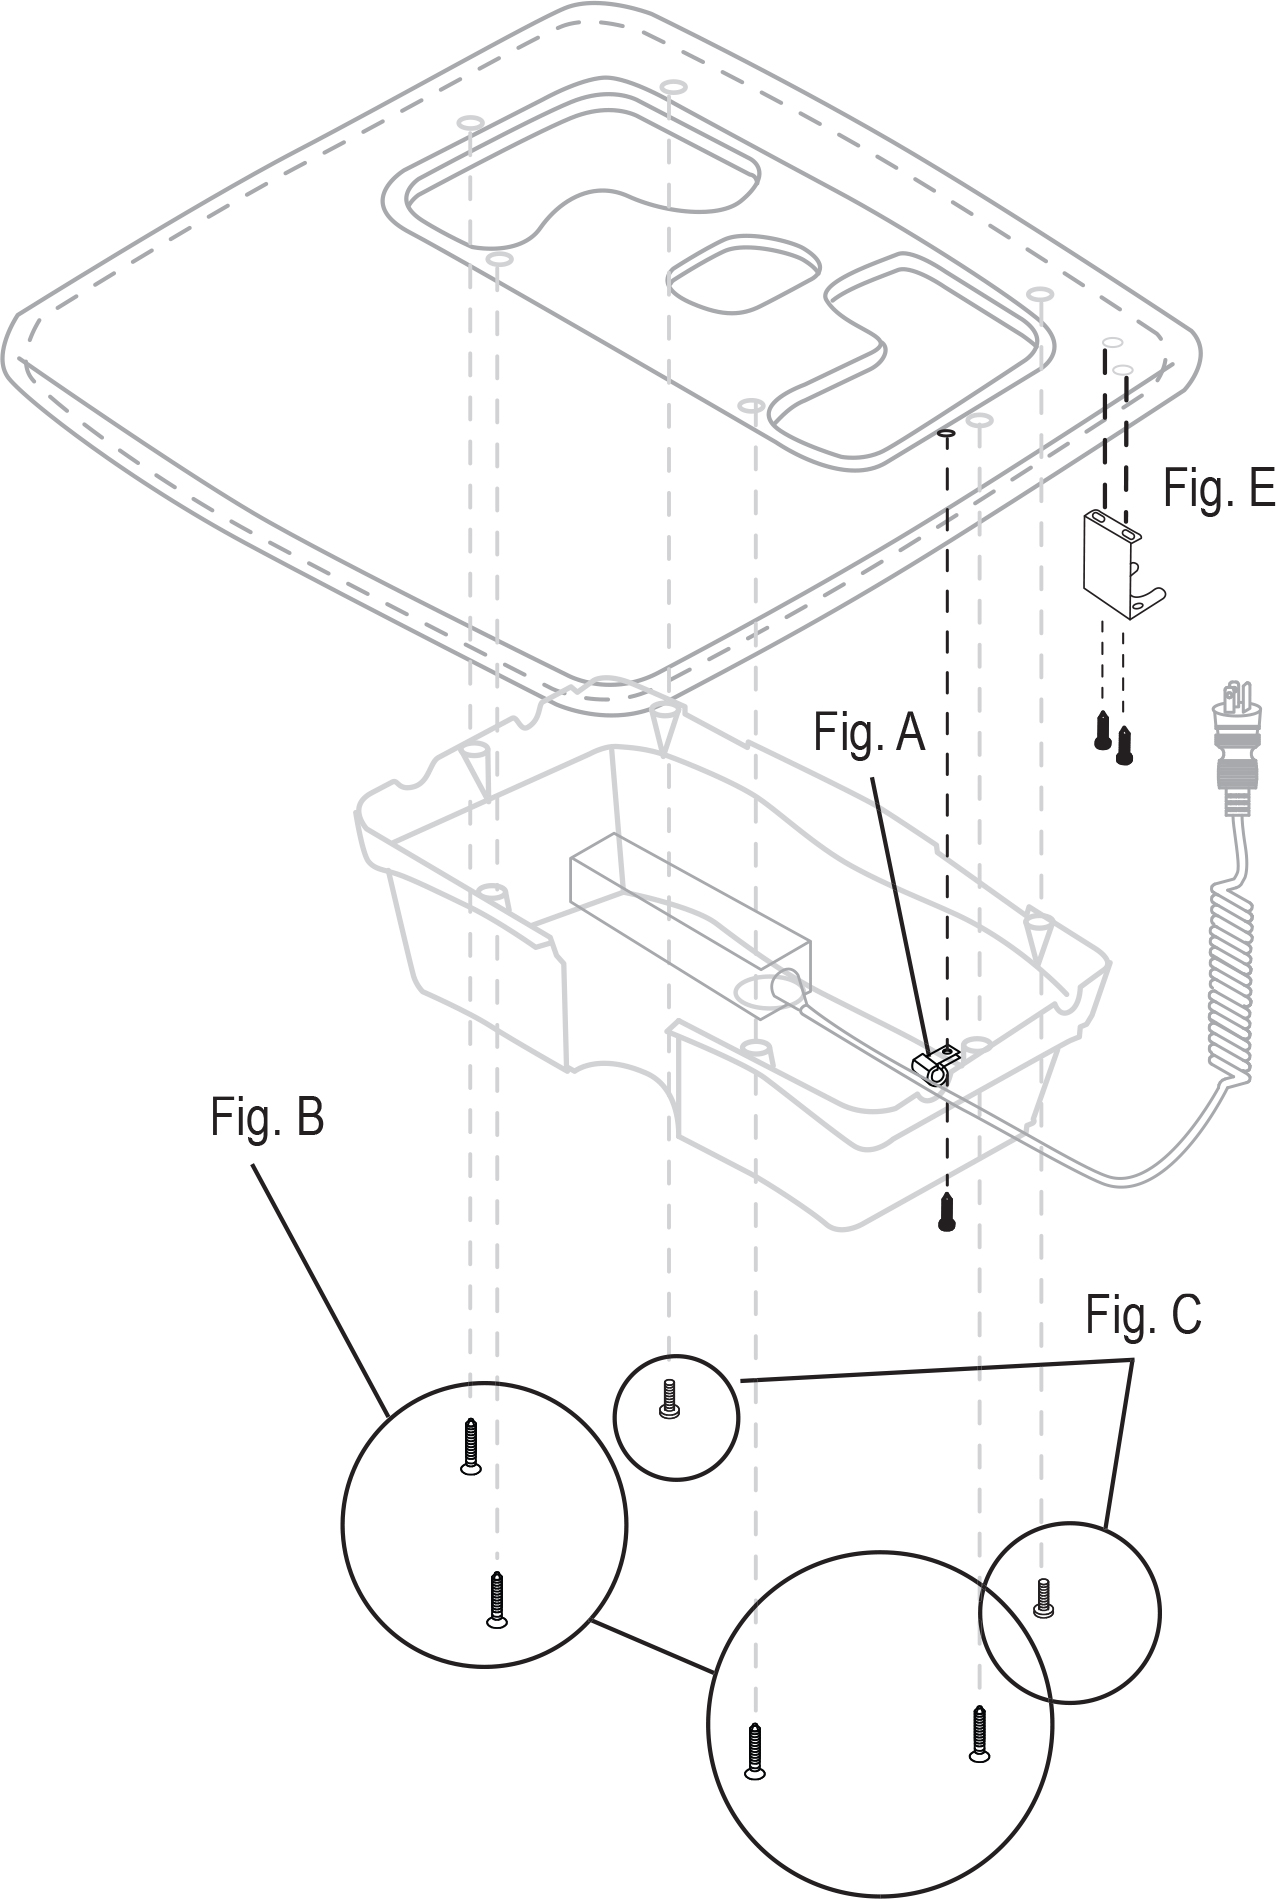
1. Arrange Power Cord within Cord Tray (See Fig.A)
2. Fasten Power Cord from underneath the worksurface by fastening cord
with cord clamp with 1/4-20 x 5/8” Long Pan Head Phillips Drive
Machine Screw.
3. From underneath the worksurface, align cord tray with pre-drilled holes
in worksurface.
Once aligned, fasten (4) #10 x 3/4” Long Pan Head Phillips Drive screws into the front (4) four locations (See Fig. B).
Finish attachment by placing
and attaching last two (2) #10-24 x 7/8” Long Pan Head Phillips Drive Screws into the back side of cord tray (See Fig. C)
4. Attach Cord Hook from underneath
the worksurface using (2) #10 x 3/4” Long Pan Head Phillips Drive Recex Low Root Screws (See Fig.E)
INSTALLATION WITH WORK SURFACE ONLY
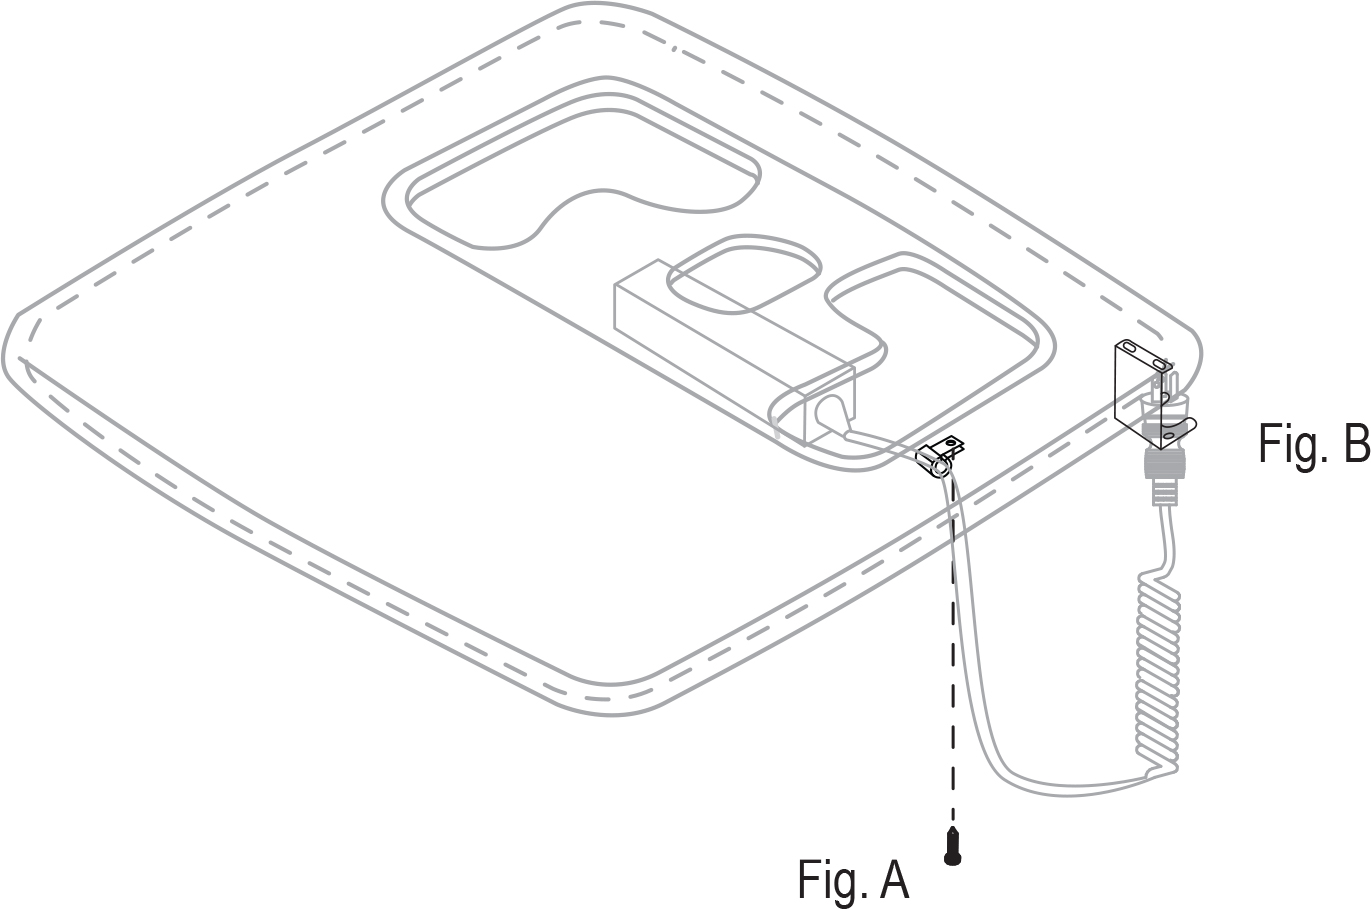
1. Fasten Power Cord from underneath the worksurface by fastening cord and cord clamp with 1/4-20 x 5/8” Long Pan Head Phillips Drive Machine Screw (See Fig. A)
2. Attach Cord Hook from underneath the worksurface using (2) #10 x 3/4” Long Pan Head Phillips Drive Recex Low Root Screws (See Fig.B)
Comments
0 comments
Please sign in to leave a comment.